
An extended concrete slab may be desired for various reasons. Perhaps you need room to park larger vehicles, or simply want more room.
Plan Your Expansion
Extending a concrete slab may seem daunting at first, but its long-term value and benefits make the cost and effort worthwhile.
Start by marking your expansion area with landscaping paint or a marker to help ensure straight excavation lines. Dig out to an appropriate depth that can accommodate both your gravel subbase and concrete slab, so as to have enough room to grow.
To ensure the process runs as efficiently and smoothly as possible, consider contracting a design and build firm to oversee your entire construction process from beginning to end. They can take care of everything from planning stages through final completion; as well as arrange builders or other specialists when needed.
Excavate the Expansion Area
Step two of expanding a concrete slab involves marking off the area you intend to excavate using landscaping paint or rope lines for even markings. After your excavation zone has been marked off, dig down until your digging reaches at least nine inches below your existing patio surface.
Extending a concrete slabs Melbourne involves marking the area to be extended with landscaping paint, excavating and excavating for forms, installing rebar, and finally pouring concrete into place.
Once you have excavated your slab extension area, fill it with stones to fill in the space left by excavating. Use a hand tamp to compact the soil before filling your excavation site with other material.
Before pouring concrete, it is a good idea to install control joints – cuts which intentionally weaken parts of the slab – which will help minimise cracking as it dries. Rebar should also be added for increased strength.
Assemble the Concrete Forms
Once you have excavated the slab extension area, the next step should be filling in with approximately 4′ of stone as part of a concrete slab stone base material. There are various kinds of stones suitable for creating this base; we suggest No. 57 stone/gravel or Crusher Run gravel as the ideal material choice.
Once your stone is prepared, it is time to assemble your concrete forms. You will require two side form boards and two end boards – cut the end boards three inches longer than your concrete slab and nail them to each of the side form boards with 16d duplex nails.
Your concrete form also requires you to “screed” its surface using a piece of flat lumber in a sawing motion across its top.
Install the Rebar
Concrete is an extremely strong material, yet can crack under tension or torsional forces. Rebar is often added to concrete slabs to strengthen them and minimize any chance of large cracks forming in them.
When expanding a concrete slab, it’s vital that any new sections be connected to the existing one in order to prevent a gap from opening between them, which could eventually cause structural issues. Without taking this step, gaps may form between structures which will eventually cause issues.
To tie rebar, first mark the layout bars with landscaping paint or marker and install the rebar according to these marks. Next, secure it using tie wire so it doesn’t move after concrete has been poured – this step will help achieve maximum strength from your concrete mix!
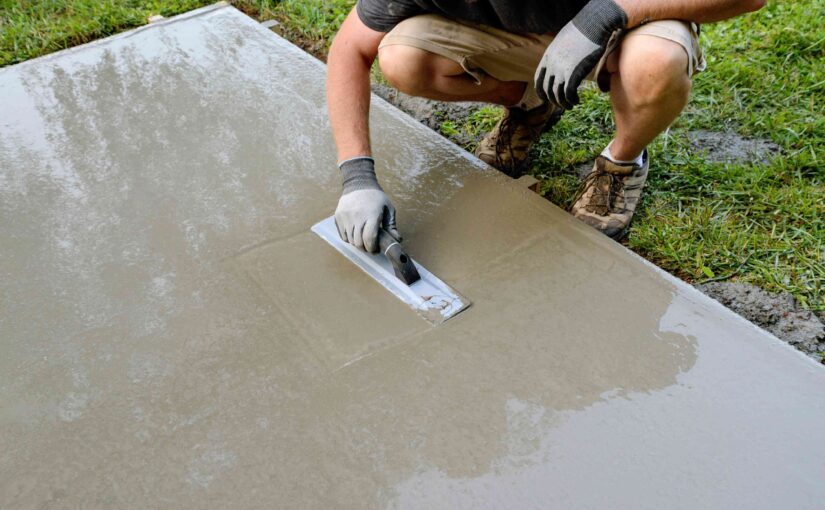
Pour the Concrete
Pouring concrete can be a messy process, so to help keep any excess water and debris at bay it is advisable to line your wood frame with release agent or vegetable oil for easy removal once dry.
Once the concrete forms have been set up, backfill the excavation site with four inches of stone; typically No. 57 stone, gravel or crusher run rock is utilized for this task.
If you are working on a slope, use stakes at each corner to support the form. Attach these braces to the long side form board with nails, and reinforce them using kickers driven diagonally into the soil attached to these braces – this will help secure and stabilize the final slab once its been poured.